Monday, February 23, 2015

Achieving and keeping that beautiful color!

I think it's time to finally go over my routine for keeping my hair vibrant! Not sure where to start, so I'll just dive right in.

I have been coloring my hair red since 2008, so I can't speak for how well this will work for any other color, but I do know what works on my hair. I think the most important thing to mention is that red takes awhile to really get in the hair. Apparently, this is because red has the largest color molecule and it is harder to get into the hair shaft. In other words, you will need to do it a few times before it really is in there and starts to stick. When I decided to go red, I had been coloring my hair jet black for years. Totally terrified of bleach, I went to Sallys and found L'oreal Hi color.
This is an amazing product for lifting to a lighter shade, while also depositing color. There is no bleaching involved, so it is great for hair that has not been previously colored. The first use gave me crazy hot-root, while barely doing anything to the black parts of my hair. I ended up having to use it every month to gradually get my hair to a vibrant red, but I think that is part of the reason why it has stayed so well. If you've ever bleached your hair and then put color over it, you already know that it won't stick. The color has nothing to hang onto, so it just washes right out of your hair. So, I finally achieved a glorious red that I loved, but I was coming across a problem. Every month, the ends of my hair would end up this AWFUL brown/orange burnt color. Turns out, it was because I was using the hi color every month on my whole head, just damaging and stripping away at the ends. Once you have a nice foundation color, you don't need to be covering your whole head in this product every month! All you really need to do is do roots with hi-color, and then do a nice semi-permanent over the rest.

That is how I accidentally discovered Creative Image Adore. This stuff is amazing. It is completely free of any ammonia, peroxide, and alcohol. It comes in every color imaginable, and you can mix the colors together to get even more options. It sticks in hair like a champ. There is a clear gloss that, on it's own, will make your hair super soft and shiny, and help maintain your color. I can't say enough about this amazing hair color. The best part, is you can get it for cheap on ebay. This particular store had my dye to me in two days: Beauty Faves. They don't always have all of the colors, though, so I would do a search and find out what color you want and then find it on ebay. If you are here in Denver, you can also find this at Beauty Supply Warehouse, which is off of 6th and I-225 (yep, it is the old Skate City!) If you have a specific color you are looking for, I can probably help you out, as I have used every shade of pink, red, and purple in this brand.


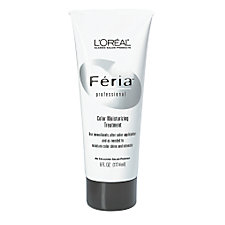
I would NOT recommend using manic panic, or color gems for your semi- perm color. They never stay and create an enormous mess. Now that you have your amazing, vibrant hair color, you need to keep it in there! As mentioned before, only use the semi-perm. hair color on everything but the roots from now on. After a few applications, you will start to see a huge difference in the staying power of the color. Try to wash your hair in only cold water, as cold as you can stand. I don't bother with this step and it lasts a month or so, but if you do this on a regular basis, you can extend that a few months! You can also mix your semi- perm color in with your color-protecting conditioner (I VERY highly recommend Feria conditioner, as I have reviewed in the past. It feels amazing every time and somehow extends the color a bit). You want to put enough to tint the conditioner without staining your shower and hands every time. Use the creative image clear gloss in with your conditioner, too, for split ends and for added shine and protection. I do this every time I wash my hair. Of course, try not to wash it every day and use a good dry shampoo if you need to. If you need to heat style, use a good protecting gloss, such as This stuff, which smells good and makes your hair super pretty and shiny, without getting gunky. (really great for ladies who straighten their curls!) If you have fine hair that is easily weighed down, Kiwi Blow Silk is amazing, however it seems to be disappearing. Here is a 3 pack, though: Kiwi Blow Silk.

Monday, February 11, 2013

Make your skin glow (via pinterest)

Pinterest is a great way to waste hours of my day on things that never seem to work out the way they are supposed to. My experience with Pinterest is that half of the DIY things fail miserably. That is why whenever I find something that actually works, I will blog about it so you don't have to learn the hard way. Make your skin glow I came across a pin to this blog and thought that surely it couldn't be this easy to rejuvinate my skin. Lo and Behold, after I rinsed my face off, my skin really did look better! It even looked better after I put makeup on! I wish I could do this every day, but it is kind of harsh for sensitive skin. I noticed that I get the best results when I wash it off with dove soap and exfoliate after, then dry my face and apply lotion.

Sally Hansen Airbrush Legs Lotion

Man have I been slacking on this blog! I thought nobody was reading it, but I got a few comments from people asking about it lately. Guess I was wrong! Ok, this blog is a review of Sally Hansen Airbrush Legs lotion. Some of the most common comments I recieve at work are about my even skin tone. Guess what? Not real. Hate to burst your bubble, but this stuff is a stripper's best friend. Yep, body makeup. Until last week, I was just fine using the spray airbrush legs. The only real complaint was that it's pretty cold coming out of the bottle, and sometimes it doesn't blend super well. No big deal. When I spotted this lotion next to the spray, I thought "Oh what the hell, may as well try it out. Maybe it will blend easier." WRONG. First of all, it was darker than the spray kind. I am a pretty pale person, but I like it that way. Not so happy with how dark the "light" color turned out. Second, this stuff is thick, and it's pretty hard to blend it evenly. It dries way too fast to really get it looking smooth. I actually had to go over it with the spray, because it looked all spotty and streaky. It gets two thumbs down. I'll stick with the spray Airbrush Legs.

Tuesday, October 25, 2011

Maintaining Your Simply Smooth Keratin Treatment

Simply Smooth makes a plethora of products to maintain your treatment throughout the 2-4 months that it lasts. All of the products can be purchased on Sleekhair.com.

Simply Smooth makes a bunch of different shampoo and conditioner options. The treatment does not come out when you heat style, instead it washes out over time. It is important to get a sodium chloride free shampoo and conditioner to maintain it for as long as possible. I have, however, found that Alterna's Bamboo Luminous Shine works just as well, if not better, for the same price. It is also Sulfate free, and readily avalible at Ulta (Click for the Shampoo and the Conditioner) This stuff is also great for untreated frizzy hair.

Simply Smooth XPRESS Keratin Treatment


Having tried the three day Simply Smooth treatment and LOVED it, I opted for the XPRESS treatment when I ran out and needed more. The original formula takes three days to process completely. While it works unbelievably well, I hated sitting around with greasy hair for days. The Xpress treatment works in just 24 hours, and can be purchased via SleekHair.com (Click HERE) for $321.21. You can only buy it here in the 16 oz bottle, but this one bottle has lasted me 4 applications so far, and is only a little over halfway gone.

The original formula smells like vanilla, and is thick and meant to be applied with a brush.It took a LOT longer to apply.

The Xpress formula doesn't smell awful, but it sure doesn't smell as great as the original. It's more chemical of a smell, which is probably why it works so much faster. I need a fan blowing on my face every time I apply it, as the fumes do irritate my eyes. This is a liquid formula, and is better put in a spray bottle to apply.

The entire process is pretty much the same. (You can read more detailed directions in my previous review)
I dye my hair first (this treatment also locks in color), wash with the special shampoo 2-3 times, blow dry, section the hair up and apply the treatment with a spray bottle and comb to distribute it, let it process for 20 min, blow dry straight, and flat iron on 400 degrees. Then don't get it wet for at least 24 hours.

This treatment does not last as long or seem quite as strong as the original, but I do like it as it is quick to apply and process. I would rather deal with this ever couple months, rather than the other one every four months or so.

Claudia Stevens Foundation Primer


Having noticed this primer at Sally's every time I go to get new hair dye, I thought I would give it a shot. It's only $4.99, so why not? (You can buy it on Sally's website, HERE)

It goes on very smooth, and you only need a tiny bit. I liked it the first few times I used it, but then I noticed the skin on my nose starting to peel off and look very dry and gross. My entire nose looked pretty nasty for a week or so, including around both nostrils, even though I quit using the primer as soon as I saw a problem.

After it healed, I thought I might give it a try JUST on the rest of my face. Surprisingly, it didn't make my skin dry. No, instead it made me break out in tiny pimples all over my face. I never get pimples, so I knew it was from the primer. My little sister told me it made her break out, also.

This primer is TERRIBLE! I do not recommend it at ALL.

Sally Hansen Hard as Wraps Acrylic Gel


As a dancer, I always have the frustrating problem of chipping my freshly painted toenails while working. Nail polish just doesn't last more than a night or two, and I know I am not the only one with this annoying problem.

When I spotted this little $5 bottle at Walgreens, next to the French Manicure kit I use, I grabbed it without hesitation.
I'm so glad I did, because this turned out to be a complete lifesaver for my nail polish!

First, I used the french manicure set to do my usual basic nails. I let that dry and then I put a coat of the acrylic gel over that. Just one medium coat should do the trick, otherwise it won't dry for ages and will peel off. (It does take awhile to dry as it is.)

I haven't had to touch up my toes at ALL in weeks. No chips, nothing! This stuff is amazing!

Thursday, March 24, 2011

Dream Lash (mascara builder)


Having read a positive review of Dream Lash, I was pretty eager to get my hands on it. It is a mascara builder, which means that you put it on in between coats of mascara and it gives you a lot more volume and longer lashes.

I couldn't find it at Rite-Aid, so I went ahead and ordered it from the official website. The website automatically added in a second "free" dream lash, and a heated eyelash curler. Then it charged me double for shipping! My order ended up being $34, which I was not pleased about, but it seemed like too much of a hassle to try and get a refund at that point.

Excited about the prospect of super gorgeous lashes, I waited for my Dream Lash to come. I waited....and waited....and waited.
After about 3 weeks, my package FINALLY came. Pretty terrible shipping for something I had to pay for TWICE for shipping and handling! I don't recommend buying it on the website, especially since I ended up spotting it at Rite Aid right after it came.

The heated eyelash curler didn't work, either, so I had to toss that thing out.

As for the actual product, it works pretty well once you get the hang of putting it on. This is what works best for me.

First, I curl my lashes.
Then, I put the Dream Lash on my eye lashes. It's not liquid, its sort of a fibrous powder that clings really well to the lashes. It is very messy, though, and will get all over your cheeks. (It's easy to brush off with a powder brush.)
Next, I carefully put my mascara on, over the Dream Lash. I use Cover Girl's Lash Blast in the purple container, it does a nice job of evenly coating the lashes and not leaving any clumps.
Before the mascara has a chance to dry, you can re coat the lashes with dream lash and repeat the mascara step, as many times as you like. Your lashes will keep looking longer, but seem to get more clumpy the more times you do this.
I finish with Rimmel's Lash Accelerator mascara on the very tips of my lashes (before the Lash Blast dries), just for a tiny extra bit of oomph.

I recommend experimenting with the stuff a little, and finding what you like to do. Make sure you have a separating brush handy, because it tends to clump very easily.

All in all, I would say I like the Dream Lash. However, I would definitely never buy it from the official website! It is much quicker to check your local CVS/ Rite Aid's As Seen On TV section!

Tuesday, February 1, 2011

Tend Skin


I've tried a million different products that are supposed to reduce ingrown hairs and razor burn, but Tend Skin is by far the best! Available at Sephora, you can buy it in either a bottle or in a handy little rolly applicator that applies the product right where you want it.

Before I found this, I had the worst ingrown hair problem ever. Bumps everywhere, some that were so bad they would plague me for months.
Tend Skin has gotten rid of 95% of these, and I almost never get razor burn!
Used after epilating, it leaves me completely smooth. After shaving, it leaves me mostly smooth.

You need to apply it immediately after hair removal, or it isn't effective. Just a warning, it burns like hell!

Wednesday, July 7, 2010

L'Oreal Eyelash Boosting Serum


While at the Walgreens a few weeks ago, I came across this Lash Boosting Serum. Although I do use Latisse regularly, I have found that my eyelashes fall out quickly and break off.

I thought, what the hell. I'll give it a shot. It was only $14.99, anyway, so at least it's not a huge loss if it doesn't work!

Basically, you just put the stuff on like you would mascara, and the drag the applicator across your upper lashline. You are supposed to use it before bed and under mascara. I tried only this for about three days before I went to get my new bottle of Latisse.

To my amazement, this stuff actually worked pretty well! I noticed a difference in my eyelashes almost immediately. They were longer, and stronger within three days. It also made my mascara go on much more smoothly.

I started back up with the Latisse and I've noticed a HUGE difference in the way it works. My eyelashes seem more moisturized, and have stopped falling out when I take my makeup off. They don't seem to fall out at all, really. They are more even than when I was only using the Latisse, and they are growing longer as well.

This serum is a great supplement to the Latisse, or even just a great product by itself. I would HIGHLY recommend it to anyone looking to improve their lashes.

Sunlabs Tanning Lotion


I have been using Sunlabs for a few years, on and off. I love this lotion, because it gives you a great, long lasting color.

It is pretty expensive, though, as far as tanning lotions go. It is NOT a gradual tanner, it is a self tanner that is meant to be applied and left on for at least 3-4 hours to develop, and then washed off. It will make you look like you smeared mud all over your body, which means that you can't wear it and go to the store or anything.

This tanner smells really strange, so it's a good thing it isn't supposed to stay on.

It is great if you are going on a vacation or something, though, because it doesn't wash out every time you bathe or swim, like a spray tan. It just kind of wears off on it's own time. It doesn't ever really become blotchy, either, and I love that.

It's a great self tanner if you are patient enough to sit around being smelly for a few hours. (Hence, my on and off again relationship with it.)

It can be purchased at Ulta, or online. I usually get mine through Shimmer Skincare

Fake Tan Tip

TIP:
If you get unwanted color on your skin (like palms), WINDEX works amazingly well! I use windex with a nail brush and a bit of soap, and it removes unwanted color from ANY fake tan, as long as you get it pretty soon after applying the tan.

Salon Bronze Airbrush Tanning System


I was getting models ready at a fashion show, lately, and one of them whipped out this handy little airbrush tan gun. As a particularly pale person, naturally I was intrigued by such a fabulously easy solution to my pigment problem.

I went on down to trusty ol' Sally's and found that it was a very reasonable $12.99. The refill is only $8.99, so I grabbed one of those, also.

The kit is basically just a little gun that you insert the bottle of color into, and then you squeeze the trigger to spray. It comes with a few makeup sponges, as the directions recommend spraying the color onto a sponge and then using that for your face, hands and feet.

It is very easy to use, but it will definitely come out better if you can get someone else to spray it on you. Make sure you shake it a lot, for a more even spray. It is messy, so doing it in the shower or bath works the best.

I really like this little airbrush system. It's very quick, and dries very quickly. It isn't orange, lasts for awhile (mine lasts up to 2 weeks!), doesn't rub off everywhere, and doesn't smell.

I love this stuff! You can buy it at Sally's website, HERE.

Saturday, March 13, 2010

Simply Smooth Keratin Treatment


I can't say enough great things about this stuff! I originally heard about it from a stylist who told me that it would make my hair more managable. I have extremely curly, crazy hair, and have never been able to just shower and walk out the front door.

I started doing research on it, and found their website: Here

I decided to just order the products myself and do the treatment at my house, rather than pay a salon a buttload of money to do it for me.

I found all the products at Sleekhair.com and even googled their site for coupons and found several good ones. The total for all of the products was about $235, and I got a coupon for free shipping.

The Process

Well, first of all, this treatment is supposed to lock in color. The information I found online suggests dying your hair immediately before applying the treatment. I painstakingly did my roots and then a semi perm over that.

When I washed the dye out, I rinsed it, then used the purifying shampoo three times. My hair was squeeky clean!

The next step is to blow dry your hair 100% dry. I used a brush to help straighten it while I dried. It took forever, but finally it was done.

Next, I got out a tint brush and bowl and put the treatment in the bowl a bit at a time as I worked. You need to coat all of your hair from root to tip in the keratin treatment. It takes a long time, but you need to make sure you get all of it. My very sweet boyfriend helped me with the back. The treatment doesnt smell too bad, kind of like vanilla. Not unpleasant, since it doesn't contain formaldehyde.

Finally, it was all coated. I put a processing cap on (you can get them at Sallys for really cheap!), and waited for about 20 minutes.

Next, I began blow drying the keratin treated hair. I used a paddle brush to make sure it got as straight as possible. My hair felt gunky, even though it was compelely 100% dry.

After that, I turned on my flat iron. You need to iron your hair with a 450 degree iron to seal the treatment in. I bought a Hot Tools iron, which isn't terribly expensive, and has temp. settings up to 450 degrees.

I went over every bit of my hair up to 5 times with the flat iron, curling the ends under a little. I was hoping my hair would feel less gunky, but it was still there when I finished. My hair looked kind of flat and greasy.

You are supposed to go 96 hours without washing your hair or getting it wet at ALL. You can't put your hair up or back or wear hats at all, any creases can become perminant. It was HARD! I HATED walking around with gunky, greasy looking hair for days. I made it abour 3 and a half days before I caved in and showered.

You are supposed to use the special x tend shampoo and conditioner to maintain the treatment, as it washes out and doesn't grow out. The less you wash your hair, the longer it lasts.

I noticed a difference immediately! Instead of getting crazy and curly, it was pretty and wavy and NOT frizzy at ALL! For the first time in my entire life, I washed it, air dried it, and walked out of the house without looking like a mad scientist!

It is SUPER soft, too, and shiny! It feels amazing! I was able to curl it and the style stayed all night without frizzing at ALL! It's amazing, I can't believe how wonderful my hair looks! The best part is that even though I washed my hair, the color still looks as good as it does immediately after I dye it. I have super bright red hair, and it fades very fast.

I LOVE this stuff, I really can't express that enough. It was SOOOO worth the price of the products and the 4 hours it took me to apply it and even the 3 and a half days of walking around looking like a grease ball without being able to put my hair up. This stuff is amazing, and it should last about 3 months.

Seriously, if you struggle with frizz, GET IT! I'm not joking.

UPDATE:
7/7/10
The treatment lasted for about 3 months, as promised, and I can't wait to get another treatment. It really did change my entire hair life. It was so much more managable, and it looked amazing! My hair was SOOOO soft. I really love it!

Thursday, February 11, 2010

Braun Silk Epil Xelle Epilator


I have a new love.
Her name is Braun.

I'm sure if you are a woman you, too, have experienced the hardships of body hair removal. We've tried the Nair, only to get rashes. Razors give us razor burn. Wax works, but it takes forever for the hair to grow long enough.

I was feeling pretty hopeless at this point. I had resorted to waxing my bikini area and armpits, and shaving everything else. Until I heard about the Braun Silk-Epil Xelle.
I read countless positive reviews online and finally went down to Ulta to see if
they carried it. They do! I picked mine up for $69.99 plus tax. (Make sure you keep your reciept for anything you buy at Ulta, btw. You can return ANYTHING you buy there as long as you have your reciept and if its a bottle of something it has to be more than half full.)

I came straight home, took it out of the box, hastily read the directions, and plugged it in. I was using it on my bikini area, on more of those pesky little strays that always seem to grow back too soon after you wax.

It's pretty easy to use, no batteries required. You just plug it into an outlet, choose which head you want to use and switch it on. It comes with a shaver head, and two epilator heads. (One with "soothing rollers" and one without) I chose the head without the rollers, snapped it on, and switched on the epilator.
It has two settings, and a neat light on it so you can see the hairs better. I turned it on high and rolled it across my skin. You are supposed to roll it against the grain of the hair, and at a 90 degree angle.

Ten minutes later, I was hair free! This thing was incredible. It stung a bit, in some places more than others, but any girl who has ever waxed before can handle the pain. Since I wax bi-weekly and tweeze strays already, the pain of the epilator was definately tolerable. You do have to hold your skin tight, though, because it will try to suck in loose skin on occasion.
I even tried it on my leg, and it worked like a charm. It hurt like hell, though, so I don't see myself doing legs anytime soon. I'm a weenie about leg waxing, too.

Long story short, I LOVE this thing! It is so efficient, so quick, it even removes tiny little stubble, and the pain isn't even that bad, especially compared to waxing. I definately recommend it!

UPDATE:
7/7/10
I thought I would update on this one. I sucked it up and did my legs after writing this review. It HURTS. BAD. I cried like a little girl.
HOWEVER, it is totally worth it. I do my legs once a week or so, and the hair is noticably thinner and easier to remove every time. It is much less painful after a few times, as the hair is not all growing back at once, and now I have smooth legs almost all the time! I shave with EVOO if I have any stubble in between epilating sessions, and it makes a HUGE difference.

Tuesday, January 5, 2010

Feria Color Moisturizing Treatement


As a girl who depends heavily on hair dye, I am always searching for the best conditioner out there. Most are all right, nothing to rave about. During a trip to Sally's, I discovered this wonderful Feria conditioner hiding on a bottom shelf.
I remember using Feria dye way back in the day when I was a brunette, and this stuff was always my favorite. It just smelled so good and made my hair amazingly soft.

I grabbed a tube of it and used it after my next hair dye. I am in love. My hair is amazing after I use it! I've never seen it so shiny and vibrant, not to mention SUPER soft and it smells like heaven. It even makes my hair more managable to straighten and curl. I actually mix this with my normal conditioner for every day use, and it still makes my hair amazing every time.

It's a whopping $8.49 at Sally's, but IMO it is well worth the cost. (I'm not the only one, look at the reviews on the website!Definately give this stuff a try if you color your hair, or even if you don't!

Monday, August 24, 2009

Verbena Custom Blends


Verbena Custom Blends

Tiring of my trusty old Calgon Hawaian Ginger body mist, I went off in search of something new. What better place to search than Etsy?
I came upon Verbena Custom Blends. I'm not sure what drew me to these products, maybe it's the fact that everything is made fresh and from scratch. Everything looks absolutely droolworthy!

I had a really hard time picking which lotion and spray I wanted, especially with things like the Pink Sugar Coconut and Chocolate Drizzle cupcake soap and the Creamy coconut and frosted lime cupcake sugar scrub clouding my vision.

Finally, I chose the Pink sugared strawberry marshmellow cream body cream and the Pink sugared strawberry marshmellow Perfume

I eagerly awaited my purchase for the next week, and at long last, I opened my mailbox and there it was! After only a week!

I tore open the packaging and found my order also came with lots of delicious samples! A few lotions and a sugar scrub!
My body cream smells soooooo delicious! It really does smell just like strawberries and marshmellows! It is thick and very moisturizing, perfect for my chronically dry skin. The scent is so long lasting that it smells exactly as good as it did when I put it on several hours ago! The perfume smells just as good. Everything is fantastic, and almost makes me want to eat it.

I LOVE this store, I will definately be ordering from it again! I have nothing but good things to say about it!

Dove Visibly Smooth Deoderant


I saw a commercial for this Dove deodorant about six months ago. It promises to help decrease underarm hair after repeated use.
Sounded great to me! I made sure to grab some the next time I was at the store. I've been using it for months, now, every night before bed (as directed by the label). I still haven't noticed any difference in my armpit hair growth. It IS very good for applying after I shave my bikini area. Seems to cut down on razor burn and ingrown hairs.

It's very disappointing, but I am going to have to give this deodorant a thumbs down in the hair reduction department.

1/5/10: Update
Still using this deoderant, and it sure didn't eliminate any hair growth. It does really help with ingrown hairs, though, if applied immediately after shaving!

Wednesday, June 3, 2009

Olive Oil

I have been using Extra Virgin Olive Oil instead of shaving cream on my legs and underarms, lately.

It's working like a charm. You only need a teeny tiny bit, and it helps to rinse the razor out very well every few strokes (or it gets kind of gummy from the oil). I shaved every day for a week, and my legs were completely soft and smooth every single day. Usually, shaving every day causes bumps and irritation, but I had none of that, and no problem eliminating stubble!

I have let the hair grow for a few days, and it seems softer and more sparse, also. I may be crazy, but I really think the EVOO is making a difference!

I probably wouldn't recommend this if you are prone to breakouts or anything, and certainly using oil on the face seems like a bad idea, but so far it seems to be working for my legs.

Smooth Away


In my long quest for efficient hair removal products, I found myself making a spur of the moment purchase of Smooth Away while at Sally's. A friend of mine told me that it worked for her, so I figured why the hell not?

Well, it's pretty much really fine sandpaper in a fancy package.
The directions told me to gently rub the hair away in small circles. The first thing I noticed was that it was rubbing off my tan, exposing pale spots on my leg. Ok, so it's good at exfoliating at least. (Even though now I had to apply more self tanner after this)

The hair was just NOT disappearing. I tried and tried and it was not removing any hair. I tried it on my boyfriend, though, and it did remove some of his really long leg hair. It left stubble behind.

So, all in all, totally not worth it. Apparently, you have to have hair like an ape or man in order for it to remove anything and it still leaves stubble. It's still easier to shave.

Two thumbs down.