Simply Smooth makes a plethora of products to maintain your treatment throughout the 2-4 months that it lasts. All of the products can be purchased on Sleekhair.com.
Simply Smooth makes a bunch of different shampoo and conditioner options. The treatment does not come out when you heat style, instead it washes out over time. It is important to get a sodium chloride free shampoo and conditioner to maintain it for as long as possible. I have, however, found that Alterna's Bamboo Luminous Shine works just as well, if not better, for the same price. It is also Sulfate free, and readily avalible at Ulta (Click for the Shampoo and the Conditioner) This stuff is also great for untreated frizzy hair.
Tuesday, October 25, 2011
Simply Smooth XPRESS Keratin Treatment
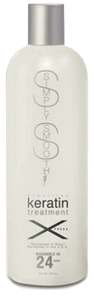
Having tried the three day Simply Smooth treatment and LOVED it, I opted for the XPRESS treatment when I ran out and needed more. The original formula takes three days to process completely. While it works unbelievably well, I hated sitting around with greasy hair for days. The Xpress treatment works in just 24 hours, and can be purchased via SleekHair.com (Click HERE) for $321.21. You can only buy it here in the 16 oz bottle, but this one bottle has lasted me 4 applications so far, and is only a little over halfway gone.
The original formula smells like vanilla, and is thick and meant to be applied with a brush.It took a LOT longer to apply.
The Xpress formula doesn't smell awful, but it sure doesn't smell as great as the original. It's more chemical of a smell, which is probably why it works so much faster. I need a fan blowing on my face every time I apply it, as the fumes do irritate my eyes. This is a liquid formula, and is better put in a spray bottle to apply.
The entire process is pretty much the same. (You can read more detailed directions in my previous review)
I dye my hair first (this treatment also locks in color), wash with the special shampoo 2-3 times, blow dry, section the hair up and apply the treatment with a spray bottle and comb to distribute it, let it process for 20 min, blow dry straight, and flat iron on 400 degrees. Then don't get it wet for at least 24 hours.
This treatment does not last as long or seem quite as strong as the original, but I do like it as it is quick to apply and process. I would rather deal with this ever couple months, rather than the other one every four months or so.
Claudia Stevens Foundation Primer

Having noticed this primer at Sally's every time I go to get new hair dye, I thought I would give it a shot. It's only $4.99, so why not? (You can buy it on Sally's website, HERE)
It goes on very smooth, and you only need a tiny bit. I liked it the first few times I used it, but then I noticed the skin on my nose starting to peel off and look very dry and gross. My entire nose looked pretty nasty for a week or so, including around both nostrils, even though I quit using the primer as soon as I saw a problem.
After it healed, I thought I might give it a try JUST on the rest of my face. Surprisingly, it didn't make my skin dry. No, instead it made me break out in tiny pimples all over my face. I never get pimples, so I knew it was from the primer. My little sister told me it made her break out, also.
This primer is TERRIBLE! I do not recommend it at ALL.
Sally Hansen Hard as Wraps Acrylic Gel

As a dancer, I always have the frustrating problem of chipping my freshly painted toenails while working. Nail polish just doesn't last more than a night or two, and I know I am not the only one with this annoying problem.
When I spotted this little $5 bottle at Walgreens, next to the French Manicure kit I use, I grabbed it without hesitation.
I'm so glad I did, because this turned out to be a complete lifesaver for my nail polish!
First, I used the french manicure set to do my usual basic nails. I let that dry and then I put a coat of the acrylic gel over that. Just one medium coat should do the trick, otherwise it won't dry for ages and will peel off. (It does take awhile to dry as it is.)
I haven't had to touch up my toes at ALL in weeks. No chips, nothing! This stuff is amazing!
Thursday, March 24, 2011
Dream Lash (mascara builder)

Having read a positive review of Dream Lash, I was pretty eager to get my hands on it. It is a mascara builder, which means that you put it on in between coats of mascara and it gives you a lot more volume and longer lashes.
I couldn't find it at Rite-Aid, so I went ahead and ordered it from the official website. The website automatically added in a second "free" dream lash, and a heated eyelash curler. Then it charged me double for shipping! My order ended up being $34, which I was not pleased about, but it seemed like too much of a hassle to try and get a refund at that point.
Excited about the prospect of super gorgeous lashes, I waited for my Dream Lash to come. I waited....and waited....and waited.
After about 3 weeks, my package FINALLY came. Pretty terrible shipping for something I had to pay for TWICE for shipping and handling! I don't recommend buying it on the website, especially since I ended up spotting it at Rite Aid right after it came.
The heated eyelash curler didn't work, either, so I had to toss that thing out.
As for the actual product, it works pretty well once you get the hang of putting it on. This is what works best for me.
First, I curl my lashes.
Then, I put the Dream Lash on my eye lashes. It's not liquid, its sort of a fibrous powder that clings really well to the lashes. It is very messy, though, and will get all over your cheeks. (It's easy to brush off with a powder brush.)
Next, I carefully put my mascara on, over the Dream Lash. I use Cover Girl's Lash Blast in the purple container, it does a nice job of evenly coating the lashes and not leaving any clumps.
Before the mascara has a chance to dry, you can re coat the lashes with dream lash and repeat the mascara step, as many times as you like. Your lashes will keep looking longer, but seem to get more clumpy the more times you do this.
I finish with Rimmel's Lash Accelerator mascara on the very tips of my lashes (before the Lash Blast dries), just for a tiny extra bit of oomph.
I recommend experimenting with the stuff a little, and finding what you like to do. Make sure you have a separating brush handy, because it tends to clump very easily.
All in all, I would say I like the Dream Lash. However, I would definitely never buy it from the official website! It is much quicker to check your local CVS/ Rite Aid's As Seen On TV section!
Tuesday, February 1, 2011
Tend Skin

I've tried a million different products that are supposed to reduce ingrown hairs and razor burn, but Tend Skin is by far the best! Available at Sephora, you can buy it in either a bottle or in a handy little rolly applicator that applies the product right where you want it.
Before I found this, I had the worst ingrown hair problem ever. Bumps everywhere, some that were so bad they would plague me for months.
Tend Skin has gotten rid of 95% of these, and I almost never get razor burn!
Used after epilating, it leaves me completely smooth. After shaving, it leaves me mostly smooth.
You need to apply it immediately after hair removal, or it isn't effective. Just a warning, it burns like hell!
Subscribe to:
Posts (Atom)


